

Welcome to the JELD-WEN window installation guide. Proper installation ensures optimal performance and longevity. This guide covers preparation, tools, and post-installation steps for a professional finish.
Overview of JELD-WEN Windows and Installation Importance
JELD-WEN windows are renowned for their durability, energy efficiency, and aesthetic appeal. Proper installation is critical to ensure optimal performance, prevent water damage, and maintain warranty validity. Incorrect installation can lead to functional issues, reduced energy efficiency, and potential safety hazards. Adhering to JELD-WEN’s installation guidelines ensures a secure, weather-tight seal and long-lasting functionality. This guide provides step-by-step instructions to help installers achieve professional results, emphasizing the importance of precision and adherence to manufacturer recommendations for a successful outcome.
Importance of Proper Installation
Proper installation ensures JELD-WEN windows function optimally, maintaining energy efficiency, durability, and weather-tight performance. Incorrect methods can lead to air leaks, water damage, and reduced lifespan, voiding warranties. Adhering to guidelines guarantees a secure fit and long-term reliability, essential for preserving structural integrity and performance. Precise installation is vital for safety, functionality, and aesthetic appeal, making it a critical step in any renovation or construction project. Proper techniques ensure windows operate smoothly, providing years of trouble-free service and enhancing overall home comfort.
Why Correct Installation is Crucial for Functionality and Durability
Correct installation ensures JELD-WEN windows function as intended, providing energy efficiency, weather-tight seals, and smooth operation. Improper alignment or leveling can lead to air leaks, reduced performance, and premature wear. Proper fastening methods, such as drilling pilot holes and using screws, prevent damage to frames and ensure structural integrity. A level, square fit guarantees optimal functionality, while sealing gaps prevents water intrusion and energy loss. Correct installation is essential for maintaining durability, safety, and long-term performance of JELD-WEN windows, avoiding costly repairs and ensuring warranty compliance.

Tools and Materials Required
Essential tools include a level, shims, drill, and screwdriver for proper fitting and leveling. Materials like flashing, sealants, and weatherproof barriers ensure a secure and durable installation.
Essential Tools for JELD-WEN Window Installation
Installing JELD-WEN windows requires specific tools for accuracy and safety. A level ensures proper alignment, while shims adjust the window to be perfectly square. A drill and screwdriver are necessary for securing the window in place. Utility knives and caulk guns are used for sealing gaps and applying weatherproofing materials. Additionally, a measuring tape, hammer, and safety gear like gloves and goggles are crucial for a successful installation. Proper tools ensure a professional finish and prevent potential issues.
Recommended Materials for a Successful Installation
For a successful JELD-WEN window installation, use high-quality materials to ensure durability and proper sealing. Flashing tape and weatherproof sealants prevent water infiltration. Foam insulation fills gaps around the window, while a sill pan directs water away from the opening. Use compatible fasteners and shims to secure the window accurately. Additionally, apply a waterproof barrier to the rough opening before installation. These materials ensure a watertight and energy-efficient seal, protecting your home from environmental factors and enhancing the window’s performance.
Preparation Steps
Ensure proper preparation for a smooth installation process. Verify window measurements, inspect the wall condition, and check local building codes to comply with regulations and ensure safety.
Verifying Measurements Before Installation
Accurate measurements are crucial for a proper fit. Use a tape measure to check the rough opening’s width, height, and squareness. Ensure the window aligns with local building codes and specifications. Double-check the window’s dimensions against the manufacturer’s guidelines to avoid mismatches. Proper alignment and squareness ensure functionality and durability. Use quality shims to level the window, as wood scraps can cause unevenness. Ensure corners form a 90-degree angle for optimal performance. This step guarantees a secure and precise installation, avoiding costly corrections later.
Checking Local Building Codes and Regulations

Compliance with local building codes and regulations is essential for a legal and safe installation. Verify requirements for structural integrity, energy efficiency, and safety standards. Ensure the window type meets local specifications, especially for factors like egress, ventilation, and fire safety. Consult local building authorities to confirm all regulations. Proper adherence ensures the installation meets legal standards and avoids potential fines or removal. This step guarantees compliance and maintains the integrity of the installation process and warranty coverage.
Installation Process
The installation process involves removing the old window, preparing the rough opening, positioning the new window, securing it, flashing, sealing, and conducting final checks for proper fit and function.
Step-by-Step Guide to Removing the Old Window
Start by removing the sashes and any hardware. Gently pry the old window frame from the opening using a pry bar, working carefully to avoid damaging the surrounding wall. Remove the sill and jambs, ensuring all remaining fasteners are taken out. Check for any debris or old sealants and clean the area thoroughly. Properly dispose of the old window and materials, ensuring the opening is ready for the new installation. Safety gloves and protective eyewear are recommended during this process.
Preparing the Rough Opening for the New Window
Ensure the rough opening matches the new window’s dimensions and is square. Check for any debris, old sealants, or rotten wood, and remove them. Inspect the header, sill, and jack studs for structural integrity. Verify the opening is level and plumb, making adjustments as needed. Use shims to stabilize the frame if necessary. Clean the area thoroughly to ensure a smooth installation process. Proper preparation ensures a secure and accurate fit for the new window, preventing future issues with alignment or sealing.
Positioning and Aligning the JELD-WEN Window
Carefully position the window in the rough opening, ensuring it is centered and evenly spaced. Use shims to support the window frame, maintaining proper alignment. Check that the window is square by measuring the diagonals and verifying they are equal. Use a level to ensure the sill and sides are plumb and level. Secure the window temporarily with screws, avoiding over-tightening. Ensure all sides are flush with the wall, and the window operates smoothly. Proper alignment is critical for functionality and long-term performance.
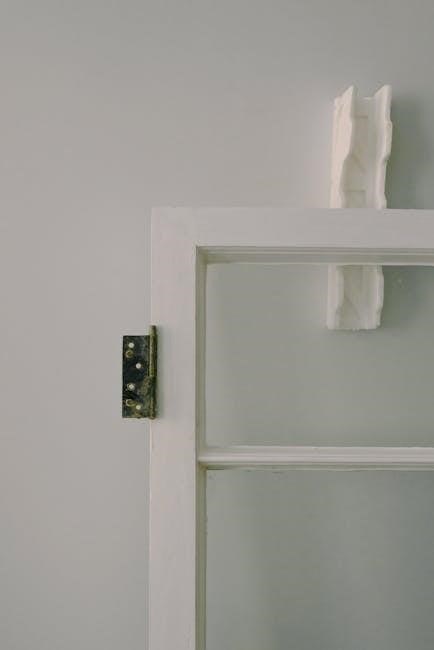
Securing the Window in Place
Once the window is properly aligned, drill pilot holes through the pre-drilled screw holes in the frame. Use screws to secure the window to the surrounding studs, ensuring not to overtighten. Avoid nailing directly into the window frame. Check that the window remains level and plumb during this process. Secure the window evenly around the perimeter, following the manufacturer’s recommended screw pattern. Ensure a weather-tight seal by verifying all gaps are properly filled and the window drains correctly to prevent water intrusion.
Flashing and Sealing the Window Opening
Apply a weather barrier to the rough opening, ensuring proper coverage around the window frame. Install a sill pan at the bottom to direct water away. Cut flashing tape to fit each side of the window, pressing firmly to ensure adhesion. Flashing should overlap the window flanges and extend beyond the frame edges. Seal all gaps with approved sealant, ensuring weep holes remain unobstructed for drainage. Verify a watertight seal around the entire opening to prevent water intrusion and ensure long-term durability of the installation.
Final Adjustments and Checks
After securing the window, ensure it operates smoothly by checking alignment and functionality. Verify the window is square by measuring diagonals to confirm they are equal. Inspect the weather-tight seal around the frame and ensure all fasteners are tightened properly. Test window opening, closing, and locking mechanisms to ensure proper operation. Conduct a final inspection to confirm compliance with local building codes and manufacturer guidelines. Address any gaps or misalignments promptly to guarantee optimal performance and durability of the JELD-WEN window installation.

Post-Installation Steps
After installation, inspect the window for proper fit, clean the area, and apply finishing touches to the frame. Ensure all debris is removed for a polished look.
Inspecting the Installed Window for Proper Fit
After installation, inspect the window to ensure it fits perfectly. Check for even gaps between the window and frame, proper alignment, and smooth operation of all moving parts. Verify that the window is square by measuring diagonals to confirm they are equal. Ensure weather-tightness by checking for any air leaks or water infiltration. Use a spirit level to confirm the window is plumb and level. Address any issues promptly to maintain functionality and energy efficiency, as outlined in JELD-WEN’s guidelines;
Cleaning Up the Installation Area
Cleaning up the installation area is essential for safety and a professional finish. Remove all debris, including scraps of material, packaging, and tools. Vacuum dust and particles from the window frame and surrounding surfaces. Wipe down the window sashes, glass, and frame with a clean, damp cloth to remove dirt or adhesive residue. Organize tools and materials neatly to ensure the workspace is tidy; Check for any leftover fasteners or materials and dispose of them properly. A clean area ensures proper inspection and prevents damage to the newly installed window.
Applying Finishing Touches to the Window Frame
After installation, apply finishing touches to the window frame for a polished look. Lightly sand any rough edges or burrs. Clean the frame with a damp cloth to remove dust or debris. If painting or staining, apply a high-quality primer first, followed by your chosen finish. Ensure all hardware is securely attached and functioning smoothly. Inspect the frame for any gaps or imperfections and seal them with appropriate caulk. Allow all finishes to dry completely before final inspection and use.

Common Mistakes and Troubleshooting
Common mistakes include using wood scraps instead of quality shims, not ensuring the window is perfectly square, and ignoring local building codes. Proper alignment is key.
Avoiding Typical Errors During Installation
Common mistakes during JELD-WEN window installation include improper alignment, using wood scraps instead of quality shims, and neglecting to ensure the window is perfectly square. Failing to verify measurements and ignoring local building codes can lead to functional issues. Drilling precise holes and using screws instead of nails is crucial for durability. Proper flashing and sealing are essential to prevent water damage. Always follow AAMA specifications and manufacturer guidelines to avoid these errors and ensure a secure, weather-tight installation.
Troubleshooting Common Issues Post-Installation
After installation, issues like air leaks, water intrusion, or operational difficulties may arise. Ensure flashing and sealing are intact to prevent leaks. Check weep holes for blockages to maintain proper water drainage. Verify hardware is securely fastened and operates smoothly. If the window doesn’t close properly, adjust the alignment or shims. For paint or stain issues, refer to JELD-WEN’s care and maintenance guidelines. Addressing these problems promptly ensures long-term performance and prevents further damage, maintaining the window’s functionality and aesthetic appeal.
Warranty and Support Information
JELD-WEN offers a limited warranty covering defects in materials and workmanship. For details, visit their website or contact customer support. Additional resources, like care guides, are also available online.
Understanding JELD-WEN’s Warranty Coverage
JELD-WEN’s warranty covers defects in materials and workmanship for a specified period. Proper installation following their guidelines is essential for warranty validity. Coverage typically lasts for several years, depending on the product. Exclusions may apply for improper installation or maintenance. For full details, refer to the official JELD-WEN installation PDF guide or contact their customer support team. Understanding the warranty ensures protection for your investment and peace of mind.
Accessing Customer Support and Resources
JELD-WEN provides comprehensive customer support and resources to assist with window installation. Their official website offers downloadable PDF guides, installation manuals, and video tutorials. For specific inquiries, customers can contact JELD-WEN’s support team directly via phone or email; Additional resources, such as troubleshooting tips and warranty information, are also available online. These tools ensure a smooth installation process and address any post-installation concerns effectively; Visit the JELD-WEN website for detailed support options and documentation.

Additional Resources
Download the JELD-WEN installation PDF guide for detailed instructions. Additional resources include online tutorials, video guides, and troubleshooting tips to ensure a successful installation process.
Downloading the JELD-WEN Installation PDF Guide
The JELD-WEN installation PDF guide is a comprehensive resource available on their official website. It provides detailed step-by-step instructions, diagrams, and specifications for various window types, including vinyl and wood models. The guide ensures compliance with AAMA standards and covers topics like preparation, tools, and troubleshooting. Downloading this guide is essential for a successful installation, as it offers visual aids and precise measurements to help you achieve professional results. It’s a must-have for both DIY enthusiasts and experienced installers.
- Visit the JELD-WEN website.
- Navigate to the “Documents” or “Support” section.
- Search for your specific window model.
- Download the PDF guide for easy reference.
Online Tutorials and Video Guides for Assistance
JELD-WEN offers online tutorials and video guides to assist with window installation. These resources are available on their official website and YouTube channel, providing step-by-step visual instructions. Videos cover topics like preparing the rough opening, aligning the window, and sealing for weatherproofing. They also include tips for avoiding common mistakes and troubleshooting. These guides are ideal for DIY enthusiasts and professionals alike, ensuring a smooth and successful installation process. They complement the PDF guide, offering a hands-on learning experience.
- Visit the JELD-WEN website or YouTube channel.
- Search for tutorials specific to your window type.
- Follow along with expert demonstrators.
Proper installation of JELD-WEN windows ensures durability and functionality. Follow the guide for a successful project, and refer to online resources for additional support and troubleshooting.
Final Thoughts on Successful JELD-WEN Window Installation
Successfully installing JELD-WEN windows requires careful preparation, precise measurements, and adherence to manufacturer guidelines. Ensure all tools and materials are on hand, and follow each step meticulously. Proper alignment and leveling are crucial for functionality and longevity. Consulting the official installation PDF and seeking professional help if needed guarantees a flawless result. Post-installation checks and maintenance will ensure your windows perform optimally for years to come, enhancing both energy efficiency and aesthetic appeal.