Safety Instructions for GE Induction Cooktop
Always read the manual before using the GE Induction Cooktop. Ensure proper installation by a qualified technician. Use suitable cookware to avoid damage. Keep a safe distance if you have a pacemaker. Never leave cooking unattended. The cooktop surface remains hot after use. Clean only when cool. Avoid using abrasive cleaners. Ensure proper ventilation in the kitchen. Safety first to prevent accidents and ensure efficient cooking.
1.1 General Safety Precautions
Read the manual thoroughly before using the GE Induction Cooktop. Ensure the cooktop is installed by a qualified technician. Keep the area around the cooktop clear of flammable materials. Avoid using it as a heating source for the room. Do not submerge electrical parts in water. Supervise children and pets near the cooktop; Always turn off the cooktop and allow it to cool before cleaning. Safety is essential to prevent accidents and ensure efficient operation.
1.2 Specific Safety Guidelines for Induction Cooking
Use cookware made of ferromagnetic materials, as other types may not work. Keep a safe distance if you have a pacemaker, as the cooktop emits electromagnetic fields. Avoid placing metal objects near the cooktop to prevent interference. The cooktop may produce noise with certain cookware, which is normal. Always ensure the cooktop is cool before cleaning. Never use abrasive cleaners or scouring pads, as they may damage the surface. Adhere to these guidelines for safe and efficient induction cooking.
Installation Requirements for GE Induction Cooktop
Ensure proper installation by a qualified technician. The cooktop must be grounded and meet local electrical codes. Maintain a minimum distance of 15 inches from adjacent surfaces. Compliance with installation requirements ensures safe and efficient operation. Always follow the manufacturer’s guidelines for a secure setup.
2.1 Necessary Installation Preparations
Ensure the area is clear and well-ventilated. Engage a qualified technician for installation. Verify electrical connections meet local codes and the cooktop is properly grounded. Maintain a minimum 15-inch clearance from adjacent surfaces. Ensure the cooktop is aligned with cabinetry for a flush fit. Use the provided installation template for accurate cutouts. Double-check all connections before powering on. Proper preparation ensures a safe and secure setup.
2.2 Key Installation Steps
Place the cooktop on a level, heat-resistant surface. Secure it with screws to prevent movement. Connect the electrical wires as per the manual, ensuring proper grounding. Tighten all connections to avoid loose terminals. Test the cooktop by turning on a burner. Refer to the manual for specific wiring diagrams and troubleshooting. Follow these steps to ensure a safe and functional installation.

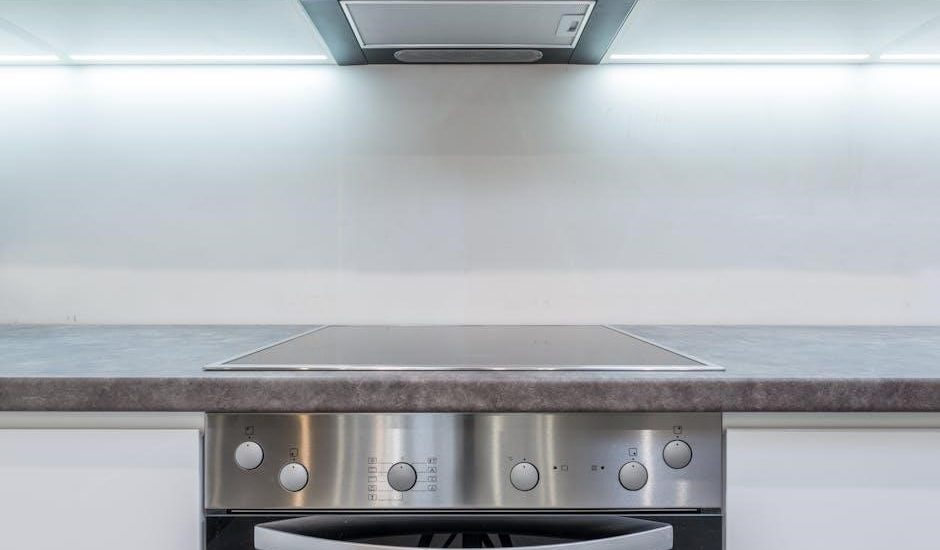
Operating the GE Induction Cooktop
Use the touch controls to adjust heat levels and settings. Utilize the built-in timer for precise cooking. The cooktop features convection technology for even heating. Navigate effortlessly with intuitive controls for a seamless cooking experience.
3.1 Understanding the Touch Controls
The GE Induction Cooktop features an intuitive touch-control interface. Use the sensors to adjust cooking zones, set timers, and manage heat levels. The interface is responsive and easy to navigate. Tap or slide your finger to change settings. The display provides clear feedback on active zones and current settings. Ensure the surface is clean and dry for optimal touch sensitivity. Explore the various functions to enhance your cooking experience.
3.2 Using the Cooking Zones
Select the appropriate cooking zone based on cookware size. Ensure cookware is compatible with induction technology. Place pots or pans centrally on the zones for optimal performance. Use the touch controls to adjust heat levels and set timers. Avoid using metal utensils near the controls to prevent scratches. Match pot sizes to zones for efficient energy use and even heating. Always monitor cooking to ensure safety and desired results.

Maintenance and Cleaning
Regularly clean the cooktop with a ceramic cleaner and non-scratch pad. Avoid harsh chemicals or abrasive materials. Wipe spills immediately to prevent hardening. Clean only when cool for optimal results and to maintain the cooktop’s performance and appearance.
4.1 Recommended Cleaning Methods
Use a ceramic cooktop cleaner and a non-scratch cleaning pad to maintain the surface. Wipe spills immediately to prevent hardening. Clean only when the cooktop is cool, as high temperatures can damage cleaning products. Avoid using abrasive materials, harsh chemicals, or bleach. For tough stains, apply the cleaner, let it sit, then scrub gently. Rinse with a damp cloth and dry thoroughly. Clean regularly to maintain performance and appearance.
4.2 Tips for Long-Term Maintenance
Regularly clean the cooktop with a ceramic cleaner and non-scratch pad to prevent grime buildup. Avoid using metal utensils that may scratch the surface. Ensure the cooktop is cool before cleaning. Dry the surface thoroughly after cleaning to prevent water spots. Check and clean the cooling vents periodically to maintain airflow. Always use compatible cookware to avoid damage. Follow the manufacturer’s guidelines for cookware size and material. Proper care ensures optimal performance and longevity.
Troubleshooting Common Issues
Check error codes in the manual for specific solutions; If the burner doesn’t stay on, ensure cookware is compatible. Noise during operation is normal. Consult the manual or contact GE support for persistent issues. Quick fixes ensure smooth cooking experiences.
5.1 Identifying Error Codes
Refer to the manual for error code meanings. Codes like E1 or E2 indicate issues such as overheating or incompatible cookware. E3 may signal a sensor malfunction. Always power off and restart the cooktop. If issues persist, contact GE support for assistance. Error codes guide troubleshooting, ensuring quick resolution and safe operation. Consult the manual for detailed solutions to specific error messages.
5.2 Resolving Common Operational Problems
Ensure the cooktop is properly installed and plugged in. If it doesn’t turn on, check the circuit breaker. For noise issues, use compatible cookware. If the cooktop overheats, reduce heat or turn it off. Clean the surface regularly to avoid damage. For persistent issues, reset the cooktop by turning it off and on. Refer to the manual or contact GE Appliances Customer Support for further assistance.
Warranty and Support Information
Register your GE induction cooktop online for warranty validation. Contact GE Appliances Customer Support through their official website or phone for assistance. The warranty typically covers parts and labor for one year.
6.1 Warranty Overview
Your GE induction cooktop is backed by a one-year limited warranty covering parts and labor. Extended warranties may be available for purchase. Proper registration ensures warranty validation. Refer to the manual for full terms and conditions. Warranty claims require proof of purchase and adherence to usage guidelines outlined in the manual. Warranty details can be found on the GE Appliances website or by contacting customer support.
6.2 Contacting GE Customer Support
For assistance, visit the GE Appliances website or call 1-800-626-2002. Live chat and email support are also available. The Owner Support section provides access to manuals, troubleshooting guides, and FAQs. Representatives are available Monday–Friday, 8 AM–8 PM ET. Ensure you have your model number ready for efficient support. Visit https://www.geappliances.com/support for comprehensive resources and assistance.
Additional Features of the GE Induction Cooktop
The GE Induction Cooktop features energy efficiency, convection cooking, and touch controls, ensuring precise temperature control and compatibility with induction cookware, enhancing cooking efficiency and user experience.
7.1 Energy Efficiency and Cost Savings
The GE Induction Cooktop excels in energy efficiency, converting up to 90% of energy into heat, reducing waste. Its convection cooking feature ensures even heating, lowering cooking times. This results in lower energy consumption and cost savings over time. The cooktop’s design focuses heat directly into compatible cookware, minimizing energy loss and promoting eco-friendly cooking. This makes it an environmentally responsible and budget-friendly choice for home use.
7.2 Compatibility with Induction-Cookware
For optimal performance, use cookware made of magnetic materials like cast iron or stainless steel. Avoid glass or aluminum, as they are not compatible. The cookware base should match the cooking zone size for efficient heat transfer. Always refer to the manual or manufacturer’s guidelines for compatibility. Proper cookware selection ensures safe, efficient, and effective cooking with your GE Induction Cooktop.
Proper Usage Guidelines
Follow guidelines for safe and efficient cooking. Use cookware with magnetic bases like stainless steel or cast iron. Ensure cookware size matches the cooking zone. Keep the cooktop clean and avoid improper use to prevent damage. Always refer to the manual for specific recommendations.
8.1 Suitable Cookware for Induction Cooking
For optimal performance, use cookware with magnetic bases, such as stainless steel or cast iron. Ensure the cookware’s base matches the cooking zone size for efficient heat distribution. Avoid glass, aluminum, or copper cookware, as they are not compatible with induction cooking. Always check the cookware’s compatibility before use to maximize safety and cooking efficiency.
8.2 Avoiding Improper Use of the Cooktop
Never use the cooktop as a heating source for the room or to warm empty cookware. Avoid placing plastic, aluminum foil, or flammable materials near the cooktop. Do not use metal utensils or abrasive cleaners, as they may damage the surface. Ensure the cooktop is installed correctly and kept away from water sources. Always follow the manufacturer’s guidelines to prevent accidents and maintain optimal performance. Safety is paramount.

Registering Your GE Induction Cooktop
Register your GE Induction Cooktop online or by mailing the pre-printed registration card. This ensures warranty validation and access to exclusive support services and updates. Register today for enhanced benefits and peace of mind.
9.1 Online Registration Process
To register your GE Induction Cooktop online, visit the official GE Appliances website. Navigate to the “Support” section and select “Product Registration.” Create or log into your GE account, enter your cooktop’s model number, and fill in the required personal and purchase details. Submit the form to complete the registration. This process ensures warranty validation and access to exclusive support services and updates. Register now for a seamless experience.
9.2 Benefits of Registering Your Appliance
Registering your GE Induction Cooktop ensures warranty validation and provides access to exclusive support services. You’ll receive personalized service, maintenance reminders, and updates on new features. Registered users also gain access to special offers, discounts, and priority customer support. This enhances your ownership experience and ensures optimal performance of your appliance. Register today to enjoy these benefits and maintain your cooktop’s efficiency and longevity.