
Safety Guidelines for Using a Craftsman Miter Saw
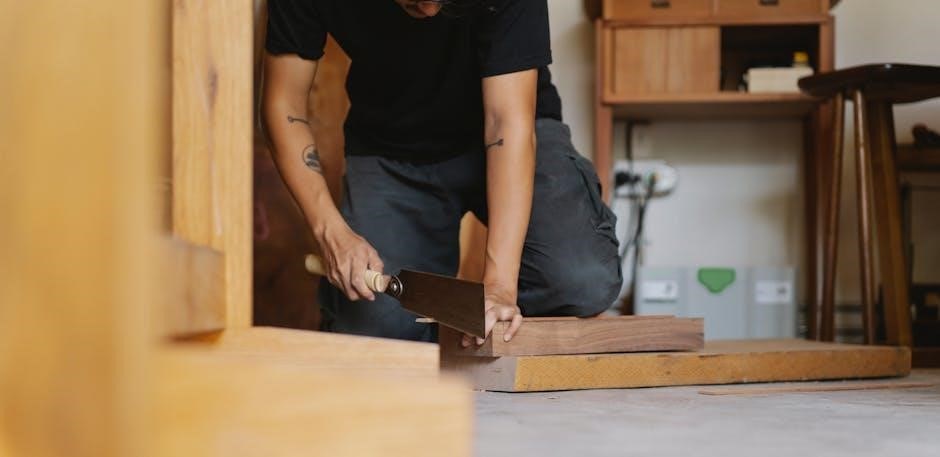
Ensure a stable setup on a sturdy workbench, away from flammable materials. Always wear protective eyewear and keep loose clothing tied back. Never operate the saw near open flames or sparks. Maintain a clean, dry work area to prevent accidents and ensure precise cuts. Keep children and pets away while the saw is in use.
1.1. Essential Safety Precautions
Always ensure the miter saw is placed on a stable, flat workbench, away from flammable materials. Avoid operating the saw in areas with open flames or sparks. Keep loose clothing and long hair tied back to prevent entanglement. Ensure the workpiece is properly supported on both sides to maintain control during cuts. Never reach near the blade while it is moving, and avoid overreaching. Use the blade guard whenever possible and ensure it is functioning correctly. Keep children and pets away from the work area. Never operate the saw if you are fatigued or under the influence of medications. Regularly inspect the saw for damage or wear and tear. Always follow the manufacturer’s guidelines for operation and maintenance to ensure safe usage and prevent accidents.
1.2. Personal Protective Equipment
When operating a Craftsman miter saw, it is crucial to wear appropriate personal protective equipment (PPE) to minimize risks. Always wear safety glasses or goggles to protect your eyes from flying debris. Hearing protection, such as earplugs or earmuffs, is essential due to the loud noise generated by the saw. A dust mask or respirator should be worn to avoid inhaling sawdust and particles. Additionally, wear gloves to improve grip and protect your hands from splinters or cuts. Steel-toe boots are recommended to safeguard your feet from heavy tools or falling materials. Ensure all PPE fits properly and remains secure while operating the saw. By wearing the right protective gear, you significantly reduce the risk of injury and create a safer working environment. Always prioritize PPE to maintain safety and focus on precise cutting tasks.
1.3. Emergency Procedures

In case of an emergency while using your Craftsman miter saw, act swiftly and carefully to prevent further harm. If the saw malfunctions or binds, immediately turn off the power using the dedicated switch. Do not attempt to remove the material while the blade is moving. If a piece of wood is stuck, unplug the saw before trying to dislodge it. In the event of a fire, use a fire extinguisher rated for electrical fires and evacuate the area if necessary. For injuries, provide first aid, such as applying pressure to cuts or bruises, and seek medical attention if needed. Always keep a first aid kit nearby. Stay calm and follow these procedures to ensure safety and minimize potential damage. Proper emergency response is critical for protecting yourself and others in the workspace.

Setting Up and Installing Your Craftsman Miter Saw
Begin by carefully unpacking and assembling the saw, ensuring all parts are securely tightened. Mount the saw on a level, sturdy workbench for stability. Follow the manual’s calibration steps to ensure accurate cuts. Double-check all bolts and alignments before first use to guarantee optimal performance and safety;
2.1. Unpacking and Assembling the Saw
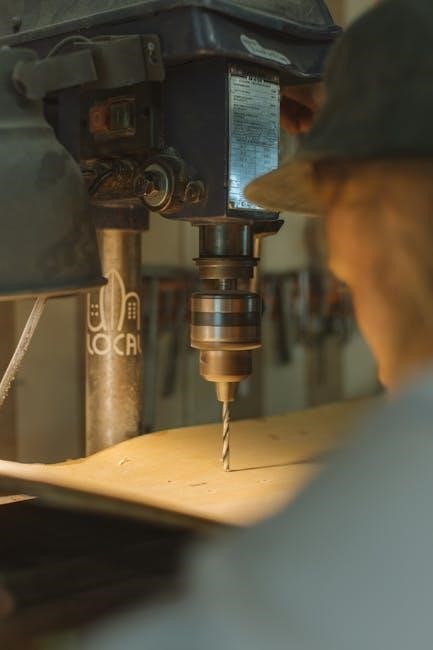
Carefully unpack the Craftsman miter saw from its box, ensuring all components are accounted for. Inspect for any damage or missing parts. Begin assembly by attaching the saw to its stand or workbench using the provided hardware. Follow the manual’s instructions to secure the saw tightly. Next, install the blade, ensuring it is properly aligned and tightened. Attach any additional features, such as the laser guide or dust collection system, according to the manufacturer’s guidelines. Double-check all connections and ensure the saw is level before proceeding. Proper assembly is crucial for safe and accurate operation. Refer to the manual for specific torque specifications and alignment adjustments. Ensure all safety features are functional before first use.
2.2. Mounting the Saw on a Workbench
Mounting your Craftsman miter saw on a sturdy workbench is essential for stability and precision. Begin by positioning the saw on a flat, durable surface, ensuring it is centered and secure. Use the provided mounting hardware, such as bolts and washers, to fasten the saw to the workbench. Tighten all connections firmly to prevent any movement during operation. Ensure the workbench is level and the saw is aligned properly for accurate cuts. For added stability, consider attaching the saw to a bench with built-in vise or clamp systems. Double-check all fasteners and ensure the saw does not wobble or shift. A secure mount is critical for safe and effective use of the miter saw. Proper installation ensures consistent performance and reduces the risk of accidents.
2.3. Calibrating the Miter Saw
Calibrating your Craftsman miter saw ensures accurate cuts and optimal performance. Start by checking the blade alignment at 0 degrees using a square or ruler to ensure it’s perpendicular to the table. Adjust the bevel and miter angles using the provided gauges, verifying with a protractor if necessary. If your saw has a laser guide, align it with the blade’s cutting path by adjusting the alignment screws. Check the fence alignment to ensure it’s parallel to the blade and secure it firmly. After calibration, test the saw with scrap wood to confirm accuracy. Regular calibration is essential, especially after moving the saw or noting inaccuracies. Refer to your manual for specific adjustment instructions and maintain sharp blades for consistent results.

Understanding the Features of a Craftsman Miter Saw
The Craftsman miter saw offers precision cutting with adjustable miter and bevel angles, a laser guide for accuracy, and a dust collection system for a clean workspace.
3.1. Overview of the Saw’s Components
The Craftsman miter saw features a robust design with essential components for precise cutting. The blade is a high-carbide tooth saw, ideal for smooth cuts. The fence provides stability for accurate miter and bevel adjustments. The miter control allows for precise angle adjustments, while the bevel control enables tilting the blade for angled cuts. A laser guide enhances visibility, ensuring straight cuts. The dust collection port keeps the workspace clean. Additional features include a clamp to secure materials and a work light for better visibility. These components work together to deliver professional-grade results, making the Craftsman miter saw versatile for various woodworking projects.
3.2. Adjustable Miter and Bevel Angles
The Craftsman miter saw offers exceptional versatility with its adjustable miter and bevel angles. The miter angle can be set from 0 to 45 degrees in both left and right directions, allowing for precise crosscuts. The bevel angle can also be adjusted from 0 to 45 degrees, enabling the blade to tilt for angled cuts on materials. This dual adjustment feature ensures that users can achieve both mitered and beveled cuts with ease. The controls are designed for smooth operation, making it simple to fine-tune angles for accurate results. This feature is particularly useful for framing, crown molding, and other projects requiring intricate angles. The combination of adjustable miter and bevel angles enhances the saw’s capability to handle a wide range of woodworking tasks efficiently.

3.3. Additional Features (Laser Guide, Dust Collection)
The Craftsman miter saw is equipped with advanced features to enhance precision and convenience. The laser guide projects a clear beam, helping users align cuts accurately before starting. This feature is particularly useful for making precise crosscuts and angled miters. Additionally, the saw includes a robust dust collection system, which minimizes sawdust and debris during operation. This not only keeps the workspace clean but also improves visibility for more accurate cuts. The combination of the laser guide and dust collection system makes the Craftsman miter saw a versatile and user-friendly tool for both professionals and hobbyists. These features ensure that each project is completed efficiently and with professional-grade results. Regular maintenance of these features is recommended to maintain optimal performance.

Essential Cutting Techniques with a Miter Saw
Mastering crosscuts, angled miters, and bevels is key. Use jigs for complex cuts to maintain precision and safety. Always align the blade with the mark and hold the workpiece firmly in place during operation.
4.1. Making Precise Crosscuts
To make precise crosscuts with your Craftsman miter saw, ensure the workpiece is securely clamped and aligned with the blade. Use a steady, controlled motion to lower the blade, maintaining consistent pressure. For accurate results, set the miter angle to 0 degrees unless otherwise required. Always double-check the measurement before cutting to avoid errors. Properly supporting long workpieces with auxiliary fences or supports can help achieve clean, precise cuts. Keep the saw blade sharp to minimize tear-out and ensure smooth operation. Regularly inspect the saw’s alignment and calibration to maintain precision in your crosscuts. This method ensures professional-quality results for your woodworking projects.
4.2. Cutting Angled Miters
To cut precise angled miters, adjust the miter angle using the saw’s miter scale and lock it in place. Ensure the workpiece is securely clamped to prevent movement during the cut. For accurate results, align the material with the saw’s fence and blade. When cutting compound angles, double-check the angle settings on both the miter and bevel scales. For intricate miters, consider marking the inside corners first and adjusting the angle accordingly. Always test the angle on scrap wood before cutting the final piece. Properly supporting long workpieces with auxiliary fences can help maintain accuracy. This technique ensures clean, precise angled miters for professional-quality joints in your woodworking projects.
4.3. Using Jigs and Fixtures for Complex Cuts
For intricate cuts, jigs and fixtures are invaluable. Create custom jigs to hold irregularly shaped materials securely, ensuring precise alignment with the blade. Use clamps or hold-downs to keep the workpiece stable during the cut. Auxiliary fences or specialized templates can guide the saw for consistent results. For example, a crown molding jig can help achieve perfect angled cuts by securing the molding at the correct orientation. Always test your jig on scrap material before cutting the final piece. Properly designed jigs and fixtures enhance accuracy, reduce waste, and simplify complex cutting tasks. They are especially useful for repetitive cuts or unique angles, making your woodworking projects more efficient and professional.
Maintenance and Troubleshooting
Regularly inspect and clean the saw, ensuring dust doesn’t accumulate. Lubricate moving parts to maintain smooth operation. Check the blade for dullness or damage and replace as needed.
5.1. Routine Maintenance Tips
Regularly clean the saw’s surfaces, removing dust and debris with a soft brush or cloth. Lubricate pivot points and hinges to ensure smooth movement. Check the blade for wear and replace it when necessary. Inspect the miter scale and bevel indicators for accuracy and adjust if needed. Ensure the fence is aligned properly with the blade. Vacuum the dust collection system to maintain efficiency. Store the saw in a dry place when not in use to prevent rust; Replace worn-out parts promptly to avoid performance issues. Always refer to the manual for specific maintenance schedules and recommendations. Proper care will extend the saw’s lifespan and maintain its precision.
5.2. Common Issues and Solutions
One common issue is blade misalignment, which can lead to uneven cuts. To fix this, ensure the blade is properly secured and aligned with the fence. Another problem is dust collection inefficiency, often caused by a clogged dust port. Clean the port regularly to maintain suction. If the miter saw vibrates excessively, check the workbench mounting and tighten any loose bolts. For inaccurate angle cuts, recalibrate the miter and bevel scales according to the manual. If the saw binds during cuts, inspect the blade for dullness or debris and replace it if necessary. Always refer to the manual for troubleshooting specific issues to ensure optimal performance and safety. Proper maintenance and quick fixes can prevent major problems.
5.3. Replacing Parts and Accessories
Regularly inspect and replace worn or damaged parts to maintain performance. The saw blade should be replaced when it becomes dull or shows signs of wear. Use a wrench to loosen the arbor nut and carefully remove the old blade. Install a new blade, ensuring it’s securely fastened. If the dust collection system is ineffective, check for blockages or replace the dust bag. Lubricate moving parts periodically to prevent rust and friction. For faulty components like the laser guide or fence, consult the manual or contact customer support for genuine replacements. Always power off the saw and unplug it before performing any replacements to ensure safety. Proper replacement of parts ensures accuracy and longevity of your Craftsman miter saw.